Using Macros
Scenario 1 - You are a development associate and some leads are assigned to you. Your job is to meet the leads and try to convert them into donors. After contacting them, you perform the following set of actions:
- Send a follow up email.
- Update the Status field as '1st Follow-up Initiated'.
- Create a task for the other sales members in your team to follow-up with the lead.
Scenario 2 -You organize a campaign, i.e. a user conference. You plan to perform the following set of actions for all the those who attend the conference.
- Send a follow up Acknowledgement email.
- Update the Status field as 'Contacted'.
- Create a task to send brochures and schedule a demo with them.
In such a case, you can create one macro that includes all the above-mentioned actions. All you need to do is just select the records and run the macro. Instead of selecting records and performing three actions, you can finish the task in one step.
Availability
![]() Profile Permission Required: Users with the Mass Email, Mass Update & Create Activities permissions.
Profile Permission Required: Users with the Mass Email, Mass Update & Create Activities permissions.
![]()
Supported Modules
Macros are available in the following modules:
- Leads
- Contacts
- Potentials
Create a Macro
You can create macros for individual modules and manage them. The macros that you create can be shared with other users in your organization's CRM account.
To create a macro
- Click the [Module] tab for which you want to create a macro.
- In the Module's Home page, click Run Macro > Create Macro.
- In the Create Macro page, specify a Name and Description for the Macro.
- Under Actions, do the following:
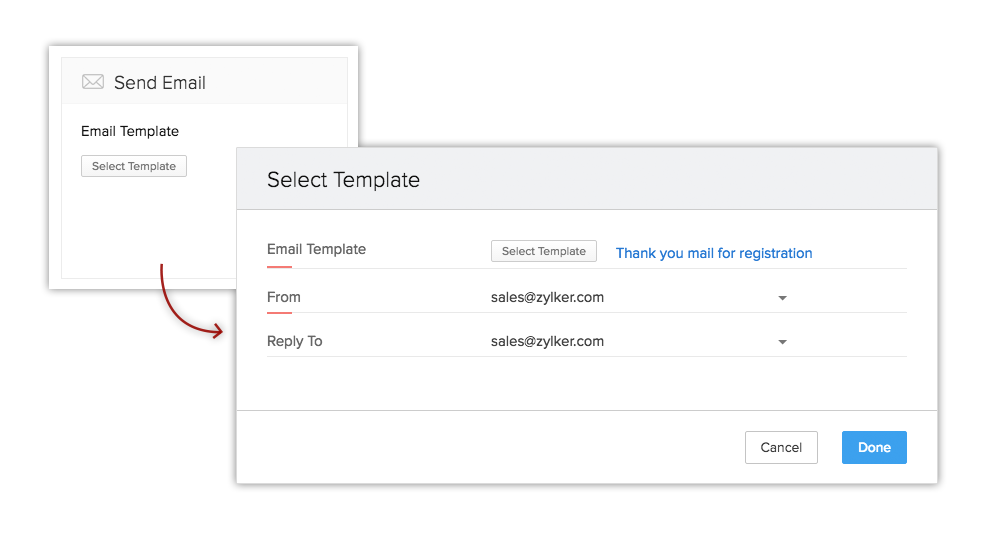
- Click on the Select Template button and choose an Email Template from the pop upThe selected email template will be used to send emails to the records when a macro is run.
- Next you have to enter the email addresses in the From and Reply to fields.Here you can choose one of these option in the drop-down list:
- your account email address
- organization email address
- email address of the record owner
- email address of the current user
- your account email address
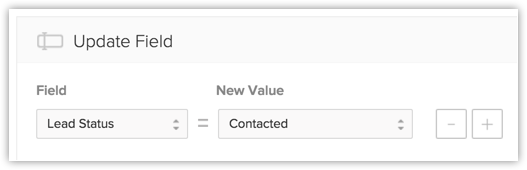
- Choose a Field and specify a value for it.The field will be updated with the specified value when a macro is run.
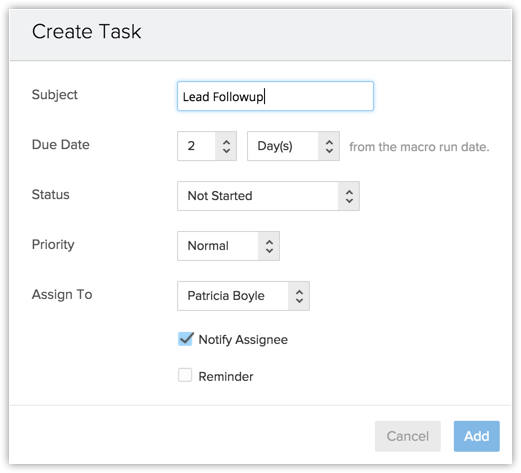
- Click Add Task. Specify the task related details like Subject, Due Date, Status, Priority, etc. and click Add.
- Select Allow other users to use this Macro checkbox to share the macro with other users.If you require your peers to execute the macro you have created on some of their records as well, you can simply share your macro with them.
- Select Users, Groups or Roles from the drop-down list.The list of users will be available.
- Click Select corresponding to the user.Alternatively, you can also select All Users.
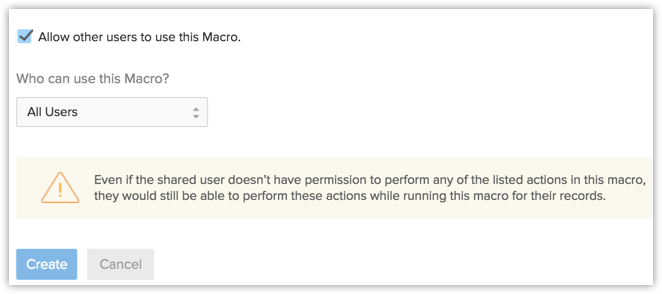
- Click Create.
Run a Macro
To run a macro
- Click the [Module] tab for which you want to create a macro.
- Select the ListView from the drop-down list.
- Select the checkboxes of the records for which you want to perform a set of actions defined in the macro.
- Click Run Macro.
- From the list of macros that you have created, click on the macro that you want to run.
- In the pop-up screen, review the actions and click Run.
Delete a Macro
You can delete only those macros that you created. The macros shared with you by other users cannot be deleted.
To delete a macro
- Click the [Module] tab in which you want to delete a macro.
- In the Module's Home page, click Run Macro > Manage Macro.
- From the list of macros, select the macro that you wish to delete.
- In the View Macro page, scroll down and click the red Delete button.
Use macros auto-suggested by Nonprofit Vertical CRM
Nonprofit Vertical CRM takes the usage of macros a notch higher by intelligently auto-suggesting macros that you could create based on your CRM activities. If you have been repeatedly performing the same set of actions over a period time on a bunch of records, Nonprofit Vertical CRM will automatically suggest that you create macros out of the actions. Consider the following scenario, in which the same set of actions are being performed thrice over a period of 10 days.
Day 1: You send a Welcome Email template to a set of leads under "Today's Leads" custom view and then update the Lead Status field to Contacted.
Day 3: You send the same Welcome Email to another set of leads under "Today's Leads" custom view and then update the Lead Status field to Contacted.
Day 8: When you repeat this action for the third consecutive time, that is, after you have sent the Welcome Email this time to a bunch of leads under "Today's Leads" custom view and updated the Lead Status field to Contacted, you will see a popup window suggesting that you create a macro out of this action.
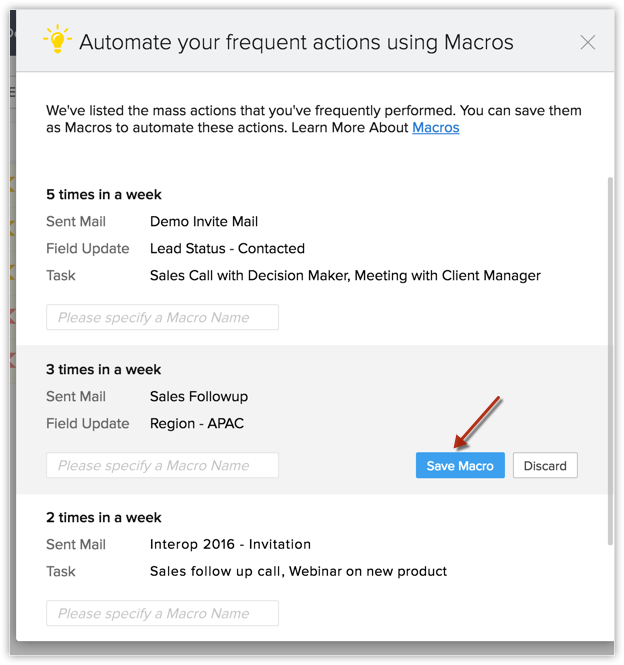
You can either SaveMacro or Discard it. Once you have saved the macro, you can find it in Manage Macros page. In case you have closed the popup window, you can also access suggested macros later from the Manage Macros page.
To access macros auto-suggested by Nonprofit Vertical CRM
- Click on the desired module.
- Choose the custom list view.
- Select a list of records and click Run Macros > Manage Macros.
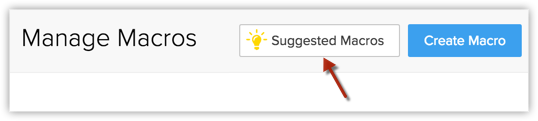
- In the Manage Macros page, click the Suggested Macros button.
- From the popup that follows, point to the desired suggested macro.
- Enter a name for the macro and click Save.If you do not want to save the suggested macro, you can also Discard it.
Understand when Nonprofit Vertical CRM auto-suggests macros
Following are the criteria that have to be met in order for Nonprofit Vertical CRM to auto-suggest macros:
- Auto-suggested macros will appear only if the same user has performed the same actions (same emails, same tasks and same field updates) at every required instance.
- Also, the actions must be performed on records from the same module, same custom view and the same page number.
- When auto-suggested macros are displayed on the execution of an action, the macro related to the most recent action you just performed will be displayed first. This will be followed by other auto-suggested macros.
- However, on the Manage Macros page, when you access Suggested Macros, the order in which macros are displayed is based on the frequency of the actions - the most frequently performed set of actions will be displayed as the first macro.
Related Articles
Using Plans
Plan A plan lets your constituents know the features you offer for memberships or other services your nonprofit provides and their price. You can clearly mention how much and how often they’ll be charged for a plan. Multiple plans can be created with ...Using Gamescope
Create a Game Games are created once the trophies have been configured. To create a new game Click the Gamescope icon. [] In the Gamescope page, click New Game. In the Create Game page do the following: Choose Game Type - Choose ...Using Authentication Token
To use the API, you'll require the Authentication Token from your CRM account. The authentication token should be passed in the request header for every API request. Please make sure that you have the permission to access the API service. If you do ...Using Calendar Synchronization via CalDAV
Create and View Synchronization of Events Once you have enabled CalDAV Access in Nonprofit Vertical CRM and configured the CalDAV account in your iOS device, the events you create in the Nonprofit Vertical CRM Calendar will synchronize with the iOS ...Collaborating Using Nonprofit Vertical CRM Feeds
Collaboration is an important aspect in any organization. When you need to finalize a deal or negotiate on the discount price or organize an event, you collaborate with your team to achieve the goal. For this purpose, tools that help you communicate ...