Using Plans
A plan lets your constituents know the features you offer for memberships or other services your nonprofit provides and their price. You can clearly mention how much and how often they’ll be charged for a plan. Multiple plans can be created with each one offering a different set of features. Corresponding prices can be set for each plan.
Below are some of the things that will help you better understand plans. You can use the Plan Operations section to find out how to create, edit, delete or make a plan inactive. The Plan Fields section describes in detail about all the plan fields.
Creating a plan
To create a new plan, please follow the below steps.
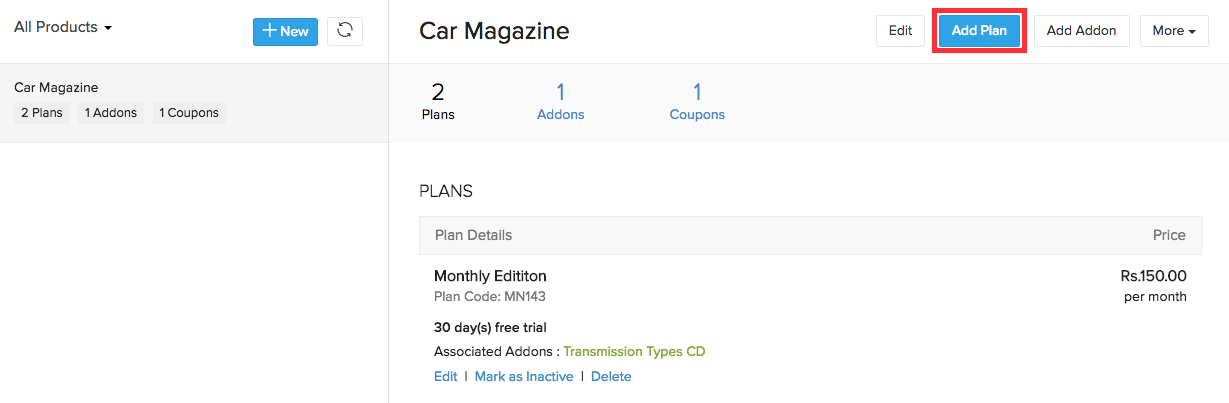
- Go to the Products tab and select the product for which a new plan needs to be created.
- Click the Add Plan button.
Editing a plan
To edit a plan, follow the below steps.
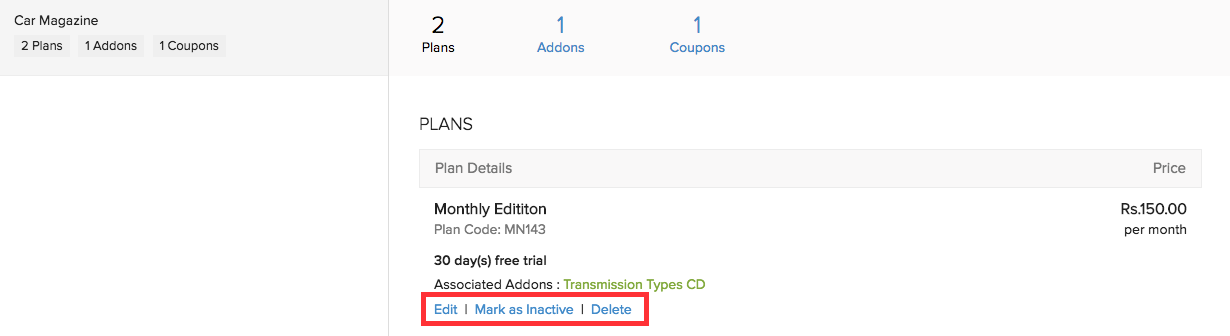
- Go to the Products tab and select the product to which the plan belongs.
- Click Edit under the respective plan.
Changes made to a plan will take effect only for new subscriptions. The existing subscribers will not be affected.
Making a plan inactive
You can make a plan inactive if you decide to do away with a plan, but do not want to delete the plan for the sake of the existing subscribers.
To make a plan inactive, follow the below steps.
- Go to the Products tab and select the product to which the plan belongs.
- Click the Mark as Inactive button under the respective plan.
Once a plan is made inactive, it can no longer be subscribed to new customers. However, the customers already subscribed to the plan will not be affected in any way.
Deleting a plan
Deleting a plan would remove it completely from the system. You will not be able to delete a plan if customers are currently subscribed to it. Follow the below steps to delete a plan.
- Go to the Products tab and select the product to which the plan belongs.
- Click Delete under the respective plan.
Plan Fields
Here’s what the plan creation form will look like.
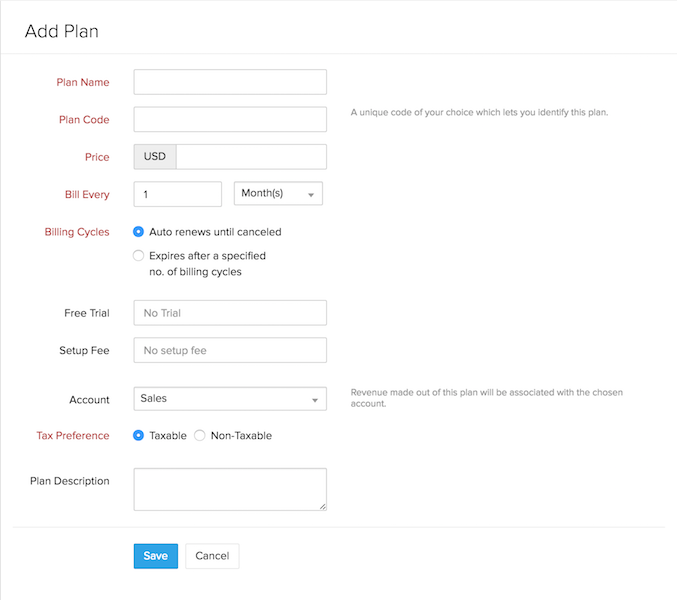
Naming a plan
The plan name you choose while creating a plan will be displayed in the invoices you send to customers as well. A plan should be named in a way that you can identify the features it offers without going into its details.
Basic monthly is better than Plan A.
Why do I need plan codes?
The Nonprofit Vertical Subscriptions API uses plan codes instead of plan names to identify each of your plans. Plan code is a unique identifier used to refer to a plan when a subscription is created or updated via the API. The advantage here is you can set the plan code yourself rather than using an auto generated unique ID to identify the plan.
Billing interval
Billing interval is denoted by the Bill Every field. After you’ve set the Price of the plan, its billing interval can be set in the Bill Every field.
Bill Every 2 Month(s) - The customer would be charged once every 2 months. Bill Every 1 Year(s) - The customer would be charged once a year.
Billing cycle
You can specify the number of times the customer needs to be charged.
- If you choose Auto renews until canceled, the customer will be charged until the subscription is canceled by the customer or yourself.
- If you choose Expires after a specified no. of billing cycles, you can specify the number of billing cycles after which the plan will expire.
If you want to charge a customer 3 times for one year using a 4 month duration, billing cycle will be set to 3 and billing interval would be Bill Every 4 Month(s).
Billing interval: 4 months
Billing cycle: 3
No. of charges: 3
Free trial
You can choose to provide a free trial for any number of days.
Setup fee
You can charge a one time setup fee. This will be charged along with the first customer payment.
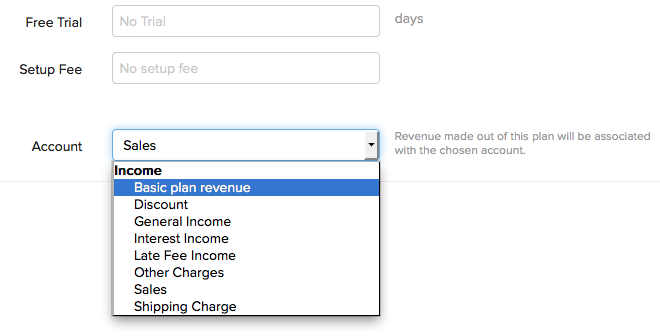
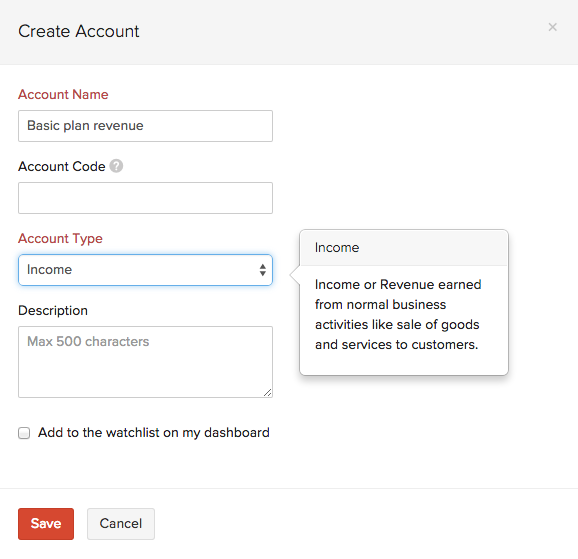
Account
This is another portion where the seamless integration with Nonprofit Vertical Books comes into play. You can store a plan’s revenue in an Income account in Nonprofit Vertical Books.
Whenever a customer subscribes to a plan, the corresponding plan’s revenue will be mapped into the account that you choose from the drop down. The drop down displays the list of Income accounts in Nonprofit Vertical Books.
To get an account listed in the drop down, you’ll have to create an Income account (Income/Other Income) in Nonprofit Vertical Books.
- Sign in to your Nonprofit Vertical Books account.
- Go to the Accountant tab and click the Chart of Accounts sub-tab.
- Click the + New Account button on the top right corner.
- After naming the account, make sure to select an Income account type. Click Save.
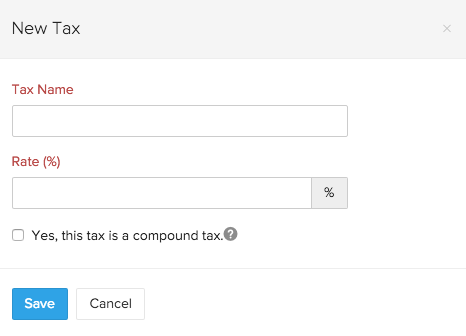
Tax
You can add tax to your plan. You can also use tax group for more than one tax.
To get a tax listed in the drop down follow the below steps.
- Go to the Customers tab.
- Click the gear icon on the top right side and select Taxes.
- Now click the + New Tax button.
- Enter the required tax details and click the Save button.
Related Articles
Using Macros
Macros are a set of actions that can be executed for a group of records in a module. These sets of actions include sending emails, creating tasks, and updating a field in the records with a specified value. You may have a set of actions that you ...Using Gamescope
Create a Game Games are created once the trophies have been configured. To create a new game Click the Gamescope icon. [] In the Gamescope page, click New Game. In the Create Game page do the following: Choose Game Type - Choose ...Using Authentication Token
To use the API, you'll require the Authentication Token from your CRM account. The authentication token should be passed in the request header for every API request. Please make sure that you have the permission to access the API service. If you do ...Using Calendar Synchronization via CalDAV
Create and View Synchronization of Events Once you have enabled CalDAV Access in Nonprofit Vertical CRM and configured the CalDAV account in your iOS device, the events you create in the Nonprofit Vertical CRM Calendar will synchronize with the iOS ...Collaborating Using Nonprofit Vertical CRM Feeds
Collaboration is an important aspect in any organization. When you need to finalize a deal or negotiate on the discount price or organize an event, you collaborate with your team to achieve the goal. For this purpose, tools that help you communicate ...