Organization Settings
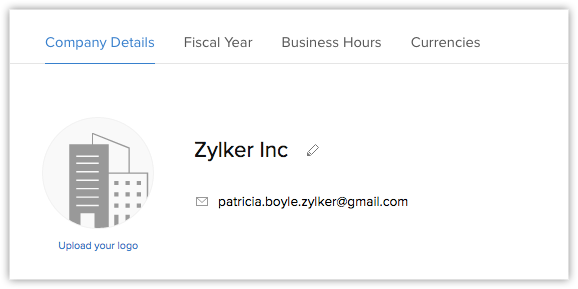
Edit Company Details
To change company details
- Log in to Nonprofit Vertical CRM with Administrator privileges.
- Click Settings > Setup > General > Company Details.
- Under Company Details tab, click Edit icon.
- In the Company Details pop-up, add the necessary details of your company.
- Click Save.
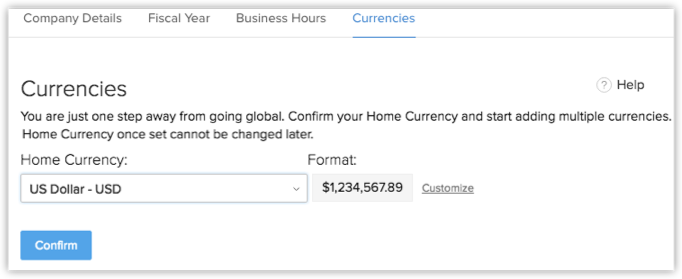
Set Currency
Setting currency is an organization specific feature. By default, the currency is set to US dollars ($). However, user(s) with Administrator privilege can change the currency settings depending on the organization's requirement. Based on the country locale you choose, the currency value will be updated for Quotes, Invoices, Campaigns and other billing related fields.
To select currency
- Log in to Nonprofit Vertical CRM with Administrator privileges.
- Click Settings > Setup > General > Company Details.
- Under Currencies tab, choose Home Currency from the drop-down.
- Click Confirm.
Personalize Logo
In order to give a personalized look to your account, Nonprofit Vertical CRM allows organizations to change the default logo to your company logo. The customized company logo will appear for all users within your CRM account.
- The image file size should not exceed 20 KB.
- For best results, the logo dimension should be 190 (width) by 65 (height) pixels.
- The logo file format should be .jpg / .png / .gif.
To personalize logo
- Log in to Nonprofit Vertical CRM with Administrator privileges.
- Click Settings > Setup > General > Company Details.
- In the Company Details page, click Upload your logo link.
- Browse and upload the logo. The logo file should be .jpg / .png / .gif format. Note that the image file size should not exceed 20 KB and for best results, use an image with 190 (width) by 65 (height) pixel dimensions.
Set Organization Time Zone
You can define a common time zone for your organization's Nonprofit Vertical CRM account. For Workflow Rules, a day will be calculated based on this time zone.
To set the organization's time zone
- Log in to Nonprofit Vertical CRM with Administrator privileges.
- Click Settings > Setup > General > Company Details.
- In the Company Details page, under Locale Information click Edit icon.
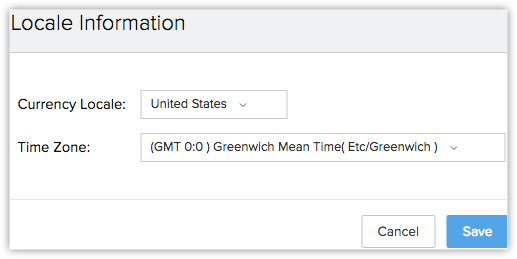
- In the Locale Information pop-up, select the Country Locale and Time Zone from the drop-down list.
- Click Save.
Assign Super Administrator
The Super Administrator is the single point of contact for all communications regarding the transactions and bills from Nonprofit Vertical CRM. The organization's administrator has the privilege to change the super administrator as per the company's requirements.
To select super administrator
- Log in to Nonprofit Vertical CRM with Administrator privileges.
- Click Settings > Setup > General > Company Details.
- In the Company Details page, click Edit icon.
- In the Company Details pop-up window, select the Super Admin from the list.
- Click Save.
Related Articles
Managing CRM Account Settings
Once you sign up for Nonprofit Vertical CRM and have your own account, you can personalize your CRM account. By default, the mandatory information provided by you at the time of sign up, is automatically updated. After logging in, you can change ...Personal Settings
First, personalize your CRM account by changing language and time zone. Also, add your personalized signature to be used for business emails sent via Nonprofit Vertical CRM.Users, Roles and Profiles
Users: Add users to your CRM account and assign them roles and profiles. Note that only after you add a user in your account, will you be able to add new profiles and roles. For the first user that you add, the system defined role (CEO, Manager) ...Setting Up Nonprofit Vertical CRM
Setting up Nonprofit Vertical CRM for your Organization The Setup page in Nonprofit Vertical CRM helps you configure all settings necessary to get your CRM up and running. Be it personalization, automation or third-party integrations, you can ...How can I add a logo to my signature?
You can add a logo/image in your signature by following the steps given below: To add an image/logo to your signature: 1. Click Setup > Personal Settings > Signature. 2. In the Signature page, enter your signature details. 3. Click on the Insert ...