Addons
An addon contains additional features that are not part of the subscribed plan, but are made available to customers on purchase of the addon.
Additional features like time tracking and syncing with third party apps (say) can be offered as addons.
Below are a list of things that will help you better understand addons. You can use the Addon Operations section to find out how to create, edit, delete or make an addon inactive. The Addon Fields section describes in detail about all the addon fields.
Addon Operations
- Creating an addon
- Editing addon details
- Making an addon inactive
- Deleting an addon
Addon Fields
- Addon Fields
- Types of addons
- Renewing recurring addons
- Pricing schemes
- Associating addons with plans
- Account
- Tax
Creating an addon
To create an addon, please follow the below steps.
- Go to the Products tab and select the product for which you want to create an addon.
- Click the Add Addon button.
- Fill out new addon details keeping in mind the above fields.
- Associate addon with all/selected plans.
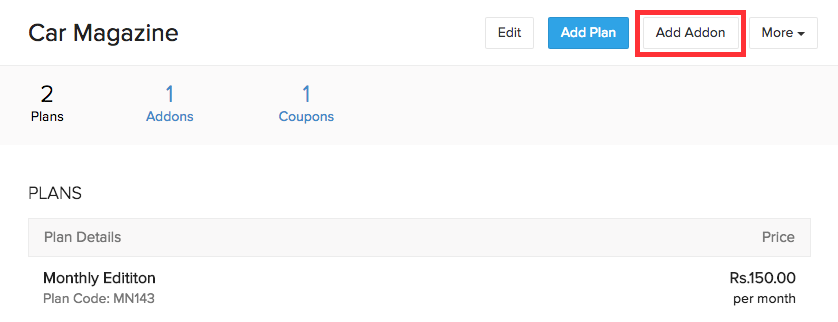
Associating addons with plans
You can associate addons with all or selected plans. Associating addons with plans can be done while creating and editing an addon.

Editing addon details
- Go to the Products tab and select the product to which the addon belongs.
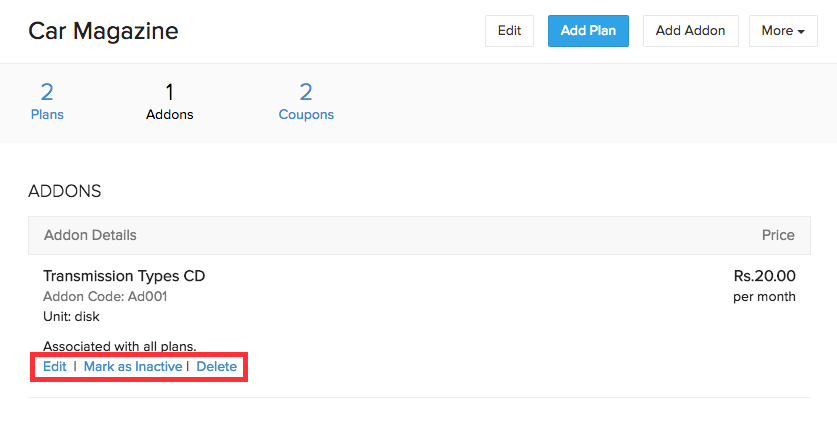
- Click Edit under the respective addon.
- Save changes after making the required changes.
Making an addon inactive
An addon can be made inactive if you do not want to associate it with new subscriptions but want subscriptions for which the addon has already been applied to still make use of it.
To make an addon inactive, go to the Products tab and click Mark as inactive on the required addon.
Deleting an addon
An addon can be deleted only if it is not associated with any subscriptions.
To delete an addon, go to the Products tab and click Delete under the addon to be deleted.
Addon Fields
Here’s what the addon creation form will look like.

Types of addons
There are two types of addons - One-time and recurring.
One-time addons - Customers are charged only once for a one-time (non-recurring) addon. A separate invoice is raised for a one time addon
You can offer a one time addon which let users to back up all their data in the cloud. Typically, users would not want to back up date often. This requirement would call for a specific occasion. So backing up data in the cloud can be a one time addon.
Recurring addons - These addons are ideal when you need to bill the customer for the same feature each time.
Consider a project management software. There can be an addon which allows users to view their projects as Gantt charts. You can charge for this addon each time you charge for the plan making it a recurring addon.
Renewing recurring addons
The price of recurring addons are included only at the time of renewal of the plan.
Example 1:
Plan: Billed monthly
Cost of plan: $20

Addon: Billed monthly
Cost of addon: $5
Each subscription charge costs $20 + $5 = $25
Example 2:
Plan: Billed once a year
Plan cost: $50/year

Addon: Charged every month
Addon cost: $5/month
Total cost of subscription: $110 ($50 + 12 * $5) for the whole year
Example 3:
The below method of calculation is applicable only for Pricing Schemes - Unit and Volumes and not for Tier and Package. For Tier and Package schemes, the addon cost will not be divided rather the full amount will be applied every month.
Plan: Monthly
Cost of plan: $10

Addon: Billed yearly
Cost of addon for an year: $48
Each subscription charge costs $10 + ($48/12) = $14/month
Pricing schemes
Unit - Addons are priced per unit . So the per unit price of an addon has to be specified.
Example - If a customer wants to buy two addons with a unit pricing scheme that cost $5/addon, the total price for the addon would be $10 (2 * $5).
Volume - In this pricing scheme, the price for an addon is determined by the quantity of addon purchased. Pricing brackets are created to specify prices based on quantity.
Example - You can create different pricing brackets.
- If the quantity of addons purchased is between 1-5, each addon costs $5.
- If the quantity of addons purchased is between 6-10, each addon costs $3.
If a customer purchases 3 addons, the total cost would be $15 (3 * $5) AND If a customer purchases 8 addons, his total cost will be $24 (8 * $3).
Tier - Quantity determines the price of the addons as well. The only difference here is that the total price is the cumulative cost of per unit prices mentioned in the pricing brackets.
Example - Let’s consider the below pricing bracket.
- If the quantity of addons purchased is between 1-5, each addon costs $6.
- If the quantity of addons purchased is between 6-10, each addon costs $4.
If a customer purchases 7 addons, the total price of the customer will be (5 * $6) + ( 2 * $4) = $38.
Package - A specified quantity of addons can be offered at a fixed price.
Example - The cost of 5 addons (say) can be fixed at $20.
Account
This is another portion where the seamless integration with Zoho Books comes into play. You can store an addon’s revenue in an Income account in Nonprofit Vertical Books.
Whenever a customer subscribes to a addon, the corresponding addon’s revenue will be mapped into the account that you choose from the drop down. The drop down displays the list of Income accounts in Nonprofit Vertical Books.
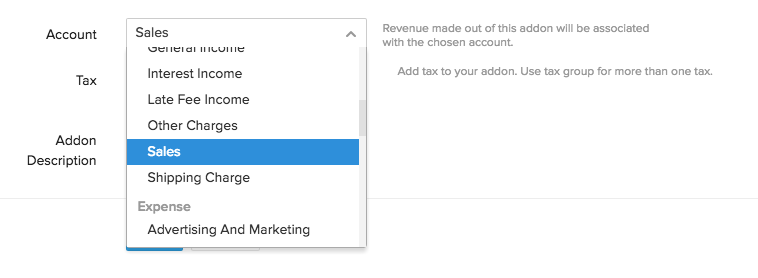
To get an account listed in the drop down, you’ll have to create an Income account (Income/Other Income) in Zoho Books.
- Sign in to your Nonprofit Vertical Books account.
- Go to the Accountant tab and click the Chart of Accounts sub-tab.
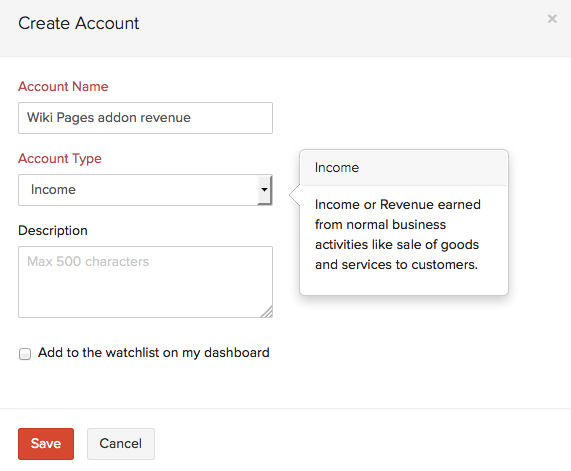
- Click the + New Account button on the top right corner.
- After naming the account, make sure to select an Income account type. Click Save.
Tax
You can add tax to your addon. You can also use tax group for more than one tax.
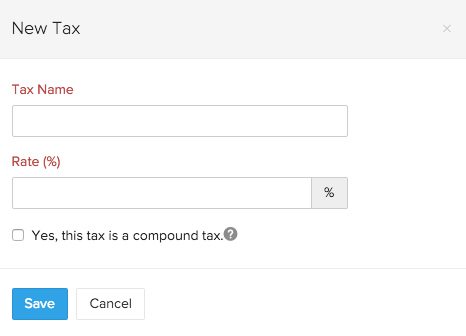
To get a tax listed in the drop down follow the below steps.
- Go to the Customers tab.
- Click the gear icon on the top right side and select Taxes.
- Now click the + New Tax button.
- Enter the required tax details and click the Save button.
Related Articles
Products
A product refers to the service you offer your constituents. There can be multiple products created if you offer more than one service. Each product can have different plans, addons and coupons associated with it. Below are the some of the things ...Working with Subscriptions
New Subscription Here’s how you create a new subscription for a customer. Go to the Customers tab and select the customer for whom a new subscription needs to be created and click the New Subscription button on the top-right corner. Choose the ...Credit Notes
Credit Notes Credits in Nonprofit Vertical Subscriptions represent the money that you owe your customer. A credit note is issued in the customer’s name in order to keep track of this debt until it’s paid off. The debt remains until it’s refunded or ...